300W High Power 7-80V to 1.4-79V 20A DC Power Supply Module Step Up/Down Module.
$ 20.59
Description
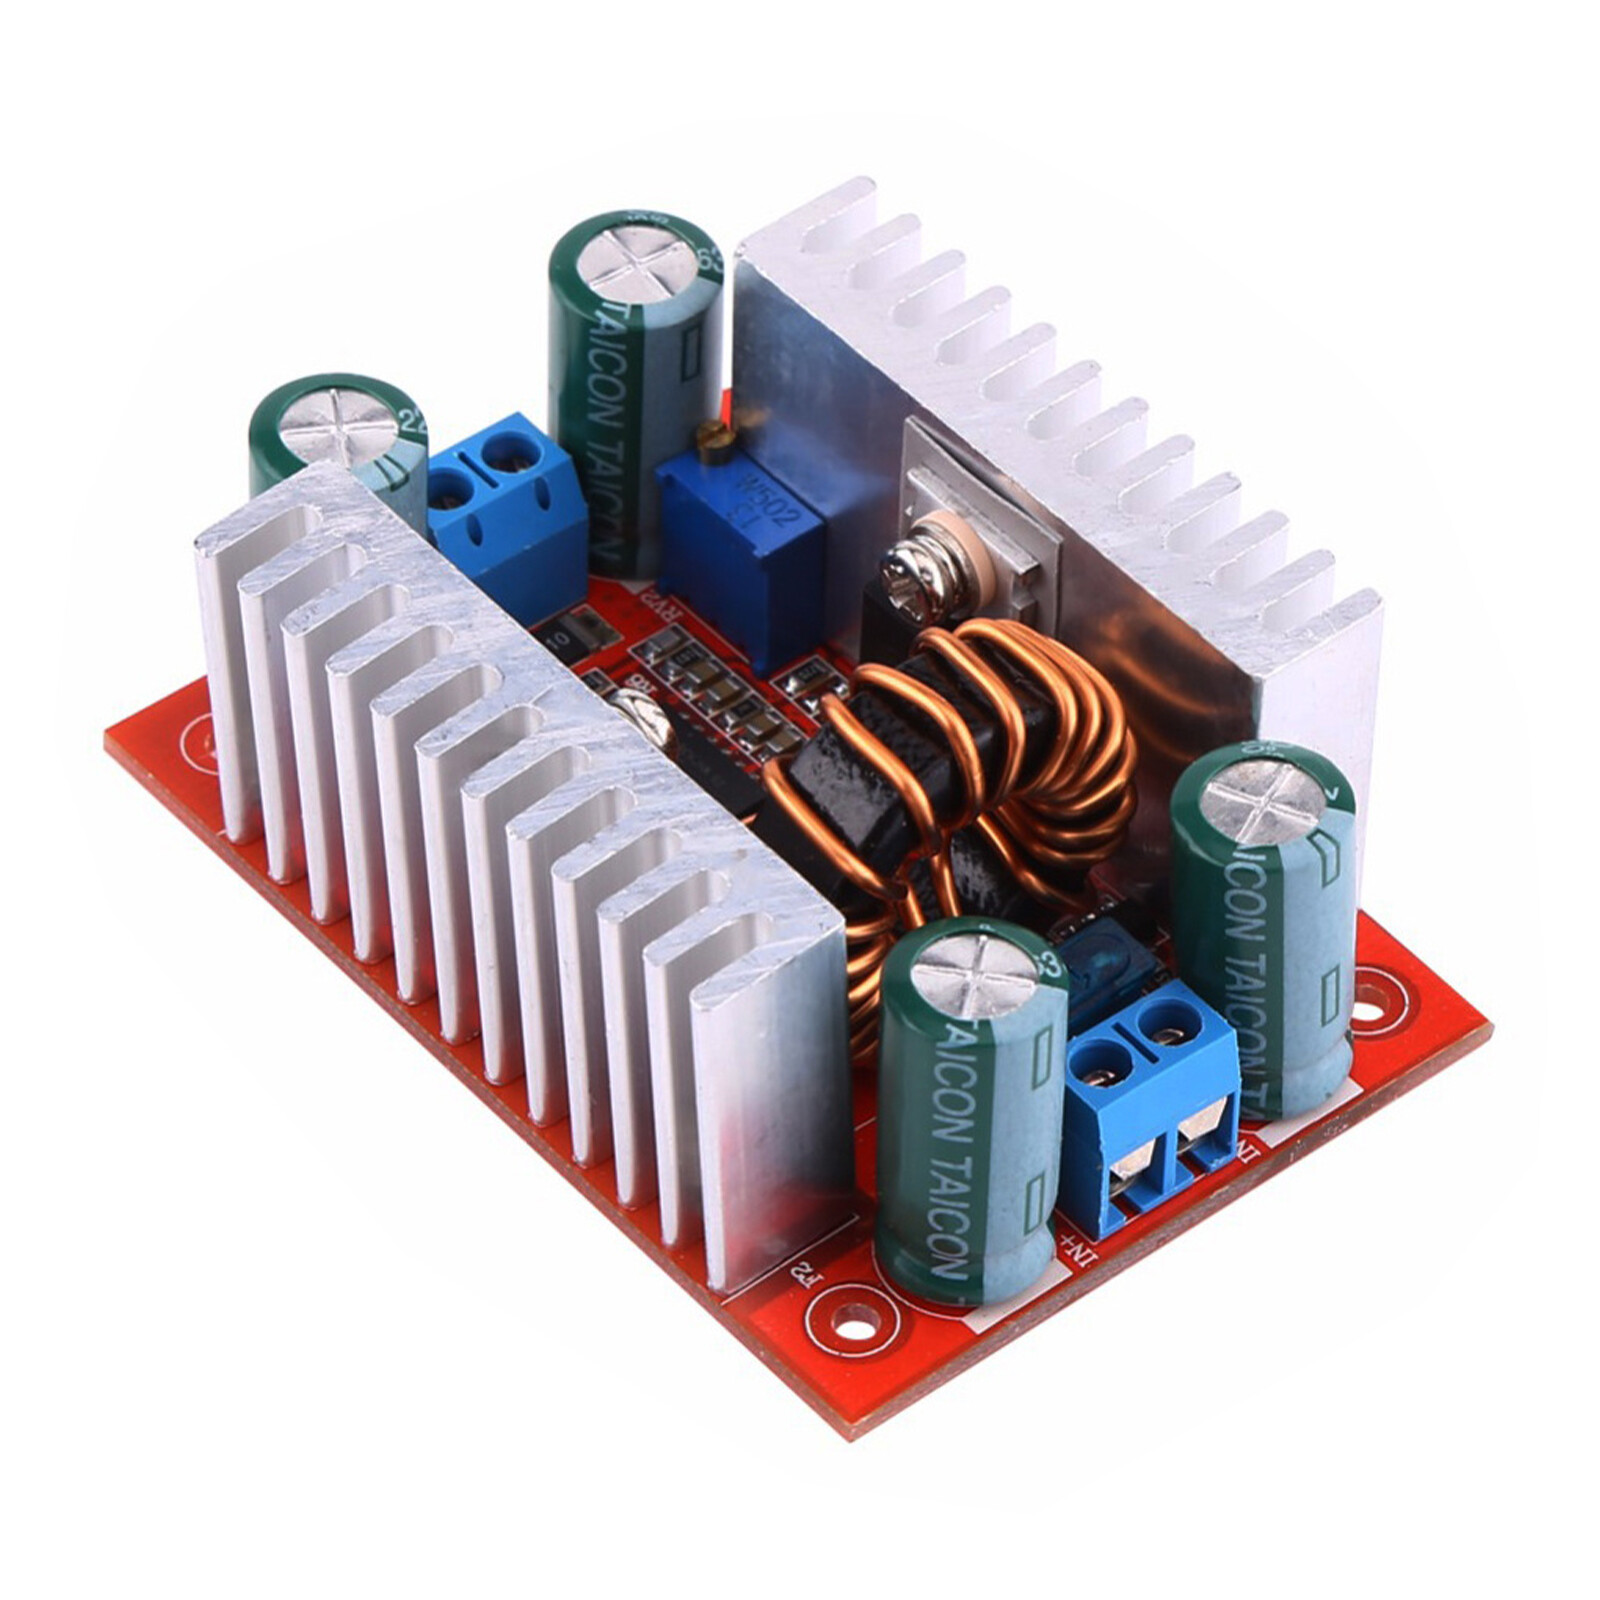
Home Electronic Component Chips Sensor Arduino Module Raspberry Pi 300W High Power 7-80V to 1.4-79V 20A DC Power Supply Module Step Up/Down Module Popular Popular Product Introduction Features: 1. Use of high quality materials, durable 2. All use screwdriver-free potentiometer, can be directly manually adjusted 3. Chip to strengthen heat dissipation, reliable and stable, high power 4. Real-time display of MPPT adjustment voltage, easy to understand at a glance 5. Wide range of use, solar charging, battery lithium charging, LED Constant current driver, voltage regulator Parameters: Input voltage range: DC7-80V Output voltage range: DC1.4-79V Voltage display range: 1.40-80.00V (accuracy +0.1V or so) Output current adjustment range: 0-20A Current display range: 0.00A-20.00A (accuracy +0.03A approx.) Adjustment knob: MPPT voltage adjustment, output voltage adjustment, output Current limit adjustment MPPT function: Yes Anti-backflow: battery backflow will not burn, when the sun is not enough without charging current There will be 0.5-40mA backflow current, it is recommended to connect the diode when charging. Constant current (current limiting): Yes Over power protection: 300W, over power will shut down the output, display 0PP Size: 108x64x48mm Solar cell charging steps. 1. Measure solar panel no-load voltage ( sunny), calculate MPPT voltage = 0.75*no-load voltage, or look directly at the manufacturer's panel Vmp parameter value. Note that the positive and negative poles should not be connected backwards. 2. Connect the solar panel to the module power supply, switch to the display MPPT voltage interface, adjust the Turn the MPPT potentiometer and adjust the value to the Vmp voltage. 3. Turn the CV potentiometer to adjust the output voltage (the size is the floating charge of the battery being charged). The output voltage is adjusted by rotating the CV potentiometer (to the floating charge of the battery being charged). 4. Short the positive and negative output terminals and turn the CC potentiometer to adjust the current limit (the size is the allowable charge voltage of the battery being charged). 4. Short the output terminals, turn the CC potentiometer and adjust the current limit (the size is the allowable charging current of the battery being charged). If the solar panel power is too small, the MPPT lamp will light up when short-circuiting, in order to keep the input voltage constant. The output current will be limited in order to maintain a constant input voltage, the current can only be adjusted downwards and the MPPT The current value seen when the MPPT light is off is the only one that makes sense. It is recommended that the current is adjusted when there is sufficient sunlight or when a constant voltage source is used as input. 5. Connect the battery for charging (be careful not to reverse the positive and negative terminals). The MPPT can be adjusted appropriately potentiometer, so that the module is always at the maximum power point output. It is recommended to connect a diode to completely prevent backflow. Notes and reminders: 1. the positive and negative input terminals must not be reversed, otherwise they will burn up. 2. When the output is connected to the battery, the positive and negative poles cannot be reversed, otherwise it will burn. 3. The maximum output current of 20A is limited to the time when the voltage difference between the input and output voltage is small. And the output power should not exceed 300W. The greater the difference between input and output voltage, the lower the conversion efficiency and the more serious the heat generation. If the heat is too serious, please reduce the power to use, or add 5V fan by yourself (with reserved The fan current is less than 300mA) to assist in heat dissipation. 4. MPPT voltage - generally set to 0.75 times the open circuit voltage of the solar panel, also You can read the nameplate or consult the solar panel manufacturer for the Vmp voltage value. is the MPPT voltage we want to set. The display shows the set voltage. It is very easy to adjust at a glance. The output current limit (CC) value is the allowable charging current of the rechargeable battery. The current is set by: short-circuiting the output directly with a wire and looking at the current display. Adjust the CC potentiometer, the displayed value is the current limit value (maximum output current value). Package list: Step-up and step-down power supply module*1 Payment Shipping Refund Payment We accept PayPal only. But we only Accept your Ebay Address ,Please Make sure it's 100% right. Payment must be received in 5 business days of auction closing. Please leave note for your special request (e.g. Colors or Size) in PayPal when you pay the order. Any special request cannot be accepted after 24 hours of payment, because most of orders will be processed instantly and same day dispatched. Shipping We maintain high standards of excellence and strive for 100% customer satisfaction! Feedback is very important to us. We request that you contact us immediately BEFORE you give us neutral or negative feedback, so that we can satisfactorily address your concerns. Refund All package need to wait 30 days (US only n eed 7-10 days) , Please take care it.Less than 30 days,we can't take a refund . If the item is defect when you receive it or you are not satisfied with it, please return it within 14 days for a replacement or money back. But the items must be back in factory condition. Please contact us and double check the return address before you return it. If is item is defective in 12 months, you can return it to us. We will send you a new replacement after receiving the defective item. Home Electronic Component Chips Sensor Arduino Module Raspberry Pi 300W High Power 7-80V to 1.4-79V 20A DC Power Supply Module Step Up/Down Module Product Introduction Features: 1. Use of high quality materials, durable 2. All use screwdriver-free potentiometer, can be directly manually adjusted 3. Chip to strengthen heat dissipation, reliable and stable, high power 4. Real-time display of MPPT adjustment voltage, easy to understand at a glance 5. Wide range of use, solar charging, battery lithium charging, LED Constant current driver, voltage regulator Parameters: Input voltage range: DC7-80V Output voltage range: DC1.4-79V Voltage display range: 1.40-80.00V (accuracy +0.1V or so) Output current adjustment range: 0-20A Current display range: 0.00A-20.00A (accuracy +0.03A approx.) Adjustment knob: MPPT voltage adjustment, output voltage adjustment, output Current limit adjustment MPPT function: Yes Anti-backflow: battery backflow will not burn, when the sun is not enough without charging current There will be 0.5-40mA backflow current, it is recommended to connect the diode when charging. Constant current (current limiting): Yes Over power protection: 300W, over power will shut down the output, display 0PP Size: 108x64x48mm Solar cell charging steps. 1. Measure solar panel no-load voltage ( sunny), calculate MPPT voltage = 0.75*no-load voltage, or look directly at the manufacturer's panel Vmp parameter value. Note that the positive and negative poles should not be connected backwards. 2. Connect the solar panel to the module power supply, switch to the display MPPT voltage interface, adjust the Turn the MPPT potentiometer and adjust the value to the Vmp voltage. 3. Turn the CV potentiometer to adjust the output voltage (the size is the floating charge of the battery being charged). The output voltage is adjusted by rotating the CV potentiometer (to the floating charge of the battery being charged). 4. Short the positive and negative output terminals and turn the CC potentiometer to adjust the current limit (the size is the allowable charge voltage of the battery being charged). 4. Short the output terminals, turn the CC potentiometer and adjust the current limit (the size is the allowable charging current of the battery being charged). If the solar panel power is too small, the MPPT lamp will light up when short-circuiting, in order to keep the input voltage constant. The output current will be limited in order to maintain a constant input voltage, the current can only be adjusted downwards and the MPPT The current value seen when the MPPT light is off is the only one that makes sense. It is recommended that the current is adjusted when there is sufficient sunlight or when a constant voltage source is used as input. 5. Connect the battery for charging (be careful not to reverse the positive and negative terminals). The MPPT can be adjusted appropriately potentiometer, so that the module is always at the maximum power point output. It is recommended to connect a diode to completely prevent backflow. Notes and reminders: 1. the positive and negative input terminals must not be reversed, otherwise they will burn up. 2. When the output is connected to the battery, the positive and negative poles cannot be reversed, otherwise it will burn. 3. The maximum output current of 20A is limited to the time when the voltage difference between the input and output voltage is small. And the output power should not exceed 300W. The greater the difference between input and output voltage, the lower the conversion efficiency and the more serious the heat generation. If the heat is too serious, please reduce the power to use, or add 5V fan by yourself (with reserved The fan current is less than 300mA) to assist in heat dissipation. 4. MPPT voltage - generally set to 0.75 times the open circuit voltage of the solar panel, also You can read the nameplate or consult the solar panel manufacturer for the Vmp voltage value. is the MPPT voltage we want to set. The display shows the set voltage. It is very easy to adjust at a glance. The output current limit (CC) value is the allowable charging current of the rechargeable battery. The current is set by: short-circuiting the output directly with a wire and looking at the current display. Adjust the CC potentiometer, the displayed value is the current limit value (maximum output current value). Package list: Step-up and step-down power supply module*1 Payment Shipping Refund Payment We accept PayPal only. But we only Accept your Ebay Address ,Please Make sure it's 100% right. Payment must be received in 5 business days of auction closing. Please leave note for your special request (e.g. Colors or Size) in PayPal when you pay the order. Any special request cannot be accepted after 24 hours of payment, because most of orders will be processed instantly and same day dispatched. Shipping We maintain high standards of excellence and strive for 100% customer satisfaction! Feedback is very important to us. We request that you contact us immediately BEFORE you give us neutral or negative feedback, so that we can satisfactorily address your concerns. Refund All package need to wait 30 days (US only n eed 7-10 days) , Please take care it.Less than 30 days,we can't take a refund . If the item is defect when you receive it or you are not satisfied with it, please return it within 14 days for a replacement or money back. But the items must be back in factory condition. Please contact us and double check the return address before you return it. If is item is defective in 12 months, you can return it to us. We will send you a new replacement after receiving the defective item.